How to Install a Strapping Machine: Step-by-Step Guide
Are you looking to streamline your packaging process and increase efficiency? Installing a strapping machine can be a game-changer for your business. In this video, we are going to show you exactly how to install a strapping machine and get it up and running smoothly. Whether you are new to strapping machines or just need a refresher, this step-by-step guide will walk you through the process. All of our products can be customized according to your specific needs, ensuring that you get the perfect strapping machine for your operation.
Step 1: Preparing for Installation
Before you begin the installation process, it is important to properly prepare your work area. Clear any clutter or obstructions from the space. Make sure you have all the necessary tools and equipment on hand, including the strapping machine, strapping material, and any additional components or accessories.
Step 2: Assembling the Strapping Machine
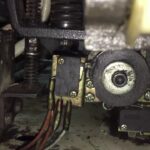
Start by unpacking the strapping machine and organizing the components. Follow the manufacturer’s instructions to assemble the machine. This typically involves securely attaching the strapping dispenser, tensioner, and sealing mechanism to the main unit. Double-check that all connections are tight and secure before moving on to the next step.
Step 3: Setting Up the Strapping Material
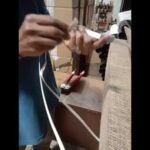
Next, you will need to load the strapping material onto the machine. Ensure that the material is properly threaded through the dispenser and tensioner according to the machine’s guidelines. Take care to avoid any twists or tangles in the strapping material, as this can cause issues during the strapping process.
Step 4: Connecting the Strapping Machine
Now it’s time to connect the strapping machine to a power source. Most strapping machines operate on standard electrical outlets, but be sure to check the machine’s power requirements before plugging it in. Once connected, make sure the machine is securely grounded to prevent any electrical hazards.
Step 5: Adjusting the Machine Settings
Before you can start using the strapping machine, you will need to adjust its settings to meet your specific requirements. This may include selecting the appropriate tension level, sealing method, and strapping speed. Refer to the machine’s user manual for detailed instructions on how to make these adjustments.
Step 6: Testing and Troubleshooting
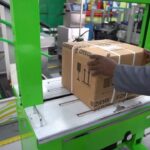
Before putting the strapping machine into full operation, it is crucial to conduct a test run and troubleshoot any potential issues. Test the machine by strapping a few sample packages to ensure that the strapping is secure and the machine is functioning correctly. If you encounter any problems or inconsistencies, consult the user manual or contact the manufacturer for assistance.
Step 7: Maintenance and Safety
Maintaining your strapping machine is essential for optimal performance and longevity. Regularly inspect the machine for any signs of wear or damage, and promptly address any issues that arise. Follow the recommended maintenance schedule provided by the manufacturer to keep your machine in top condition. Additionally, always prioritize safety when operating the strapping machine. Familiarize yourself with the safety features and guidelines outlined in the user manual.
Choose the Right Strapping Machine Supplier
When investing in a strapping machine, it is crucial to choose a reputable supplier that offers high-quality products and reliable customer support. At [Company Name], we are a leading manufacturer of strapping machines and offer a wide range of solutions to meet your packaging needs. Our team of experts can assist you in selecting the perfect strapping machine for your specific application. Check out our website to explore our product offerings and get in touch with us today.
Don’t waste any more time struggling with manual strapping processes. Install a strapping machine and revolutionize your packaging operations. Watch the video to learn how to install a strapping machine step-by-step and take your packaging efficiency to new heights.
Keywords: how to install strapping machine, strapping machine installation, installing a strapping machine, strapping machine setup, strapping machine assembly
Related posts:
 “Guide to Installing a Strapping Machine”
 “Quick Guide: Using a Manual Strapping Machine Effectively”
 Fixing Box Strapping Machine’s “Direct Problem”: Simple Guide
 Feeding paper roll into a money strapping machine: a simplified guide for paper binding in less than 28 words.
 “Guide for manual plastic strapping and strapping machine usage”
 Using a Strapping Machine: A Guide for Automatic and Semi-Automatic Models
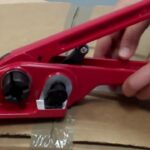 “Instructions for Using a Tensioner and Sealer Tool for Strapping” (10 words)
 How to Use a Manual Strapping Machine: Step-by-Step Guide